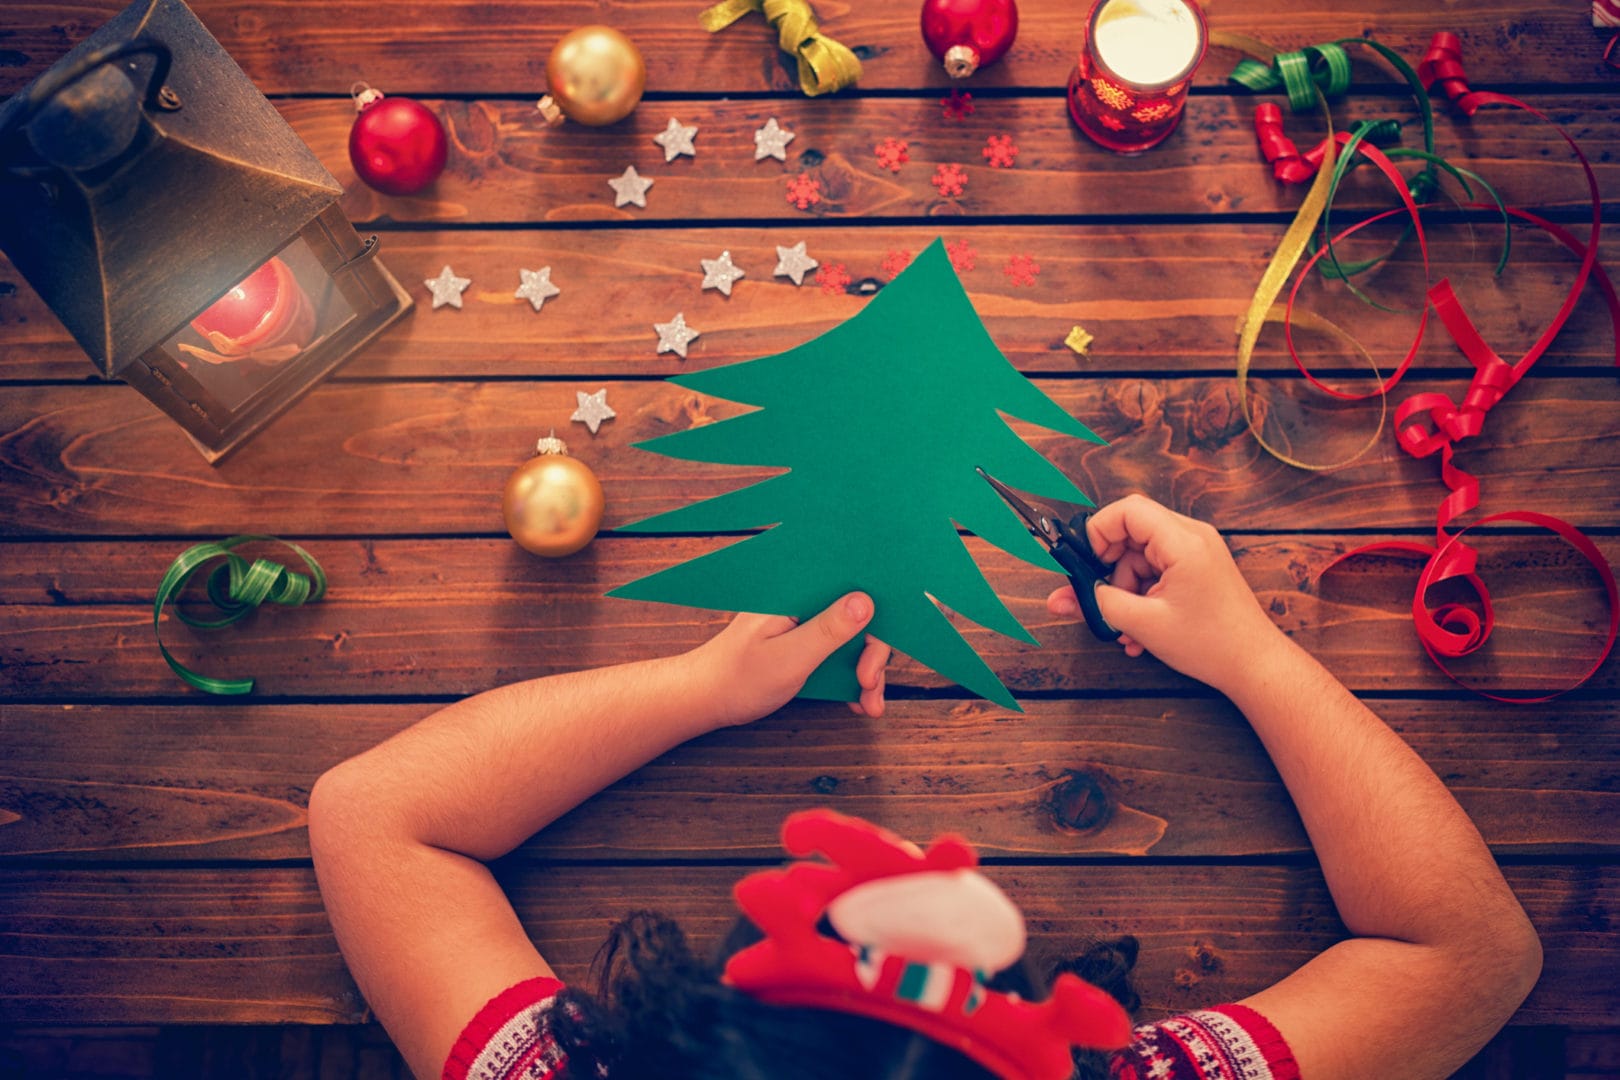
Nothing screams the holidays like spending time with the kids gathered around a table putting together holiday crafts for family and friends. Grandma loves her macaroni necklaces, but doesn’t she have enough?
Switch things up this season with these easy holiday crafts for kids that are easy for all ages. Your little ones can proudly hand them out or set them up around the house for fun holiday decor. Then watch them point to the crafts with a big grin and a shout of “I made it myself!” when family visits.
Here, check out 20 holiday crafts kids can make.
1. Paper holiday cookies
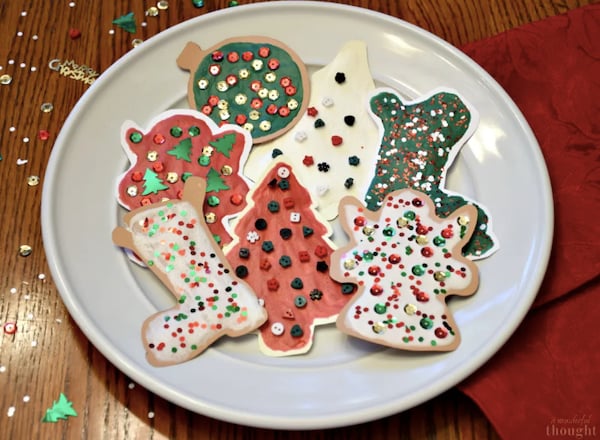
Regular holiday cookies are super fun to decorate, so why not give it a whirl with paper? (And a big bonus is there’s less mess to clean up!) These paper Christmas cookies from A Wonderful Thought are a great holiday craft for kids of any age.
Materials: Paper, glue, scissors, glitter, markers or crayons.
Directions: Get the full directions on A Wonderful Thought.
2. Toilet paper Christmas tree
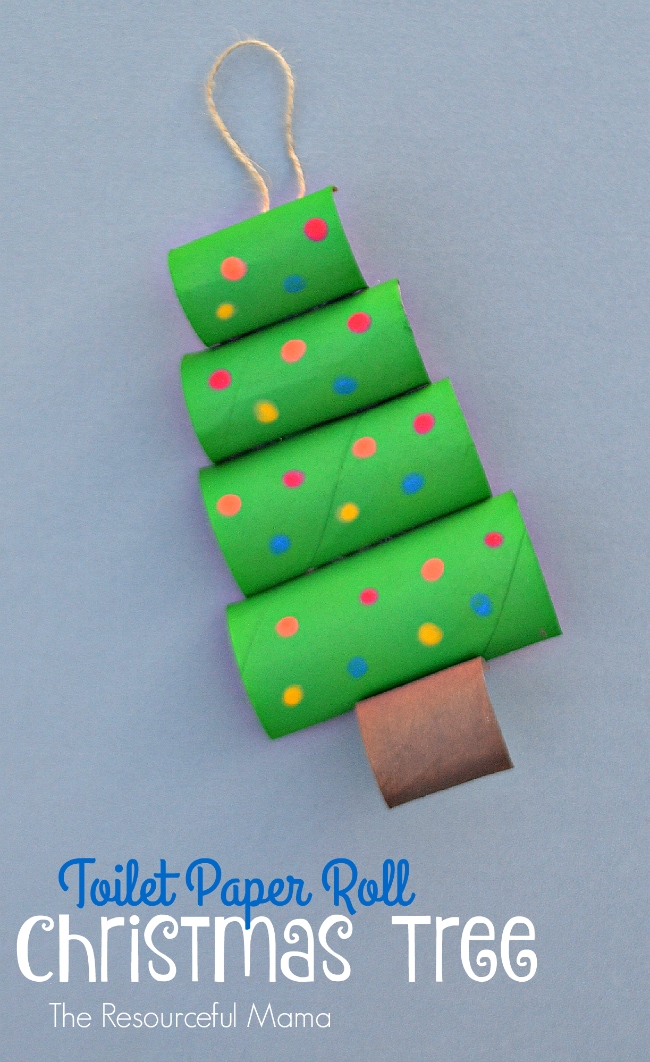
Talk about a super simple holiday craft for kids. These toilet paper Christmas trees from The Resourceful Mama are not only easy to make, but cost next to nothing.
Materials: Toilet paper rolls, markers or paint, a glue gun, twine, Q-tips, brown paper
Directions: Get the full directions on The Resourceful Mama
3. Mini pine cone trees
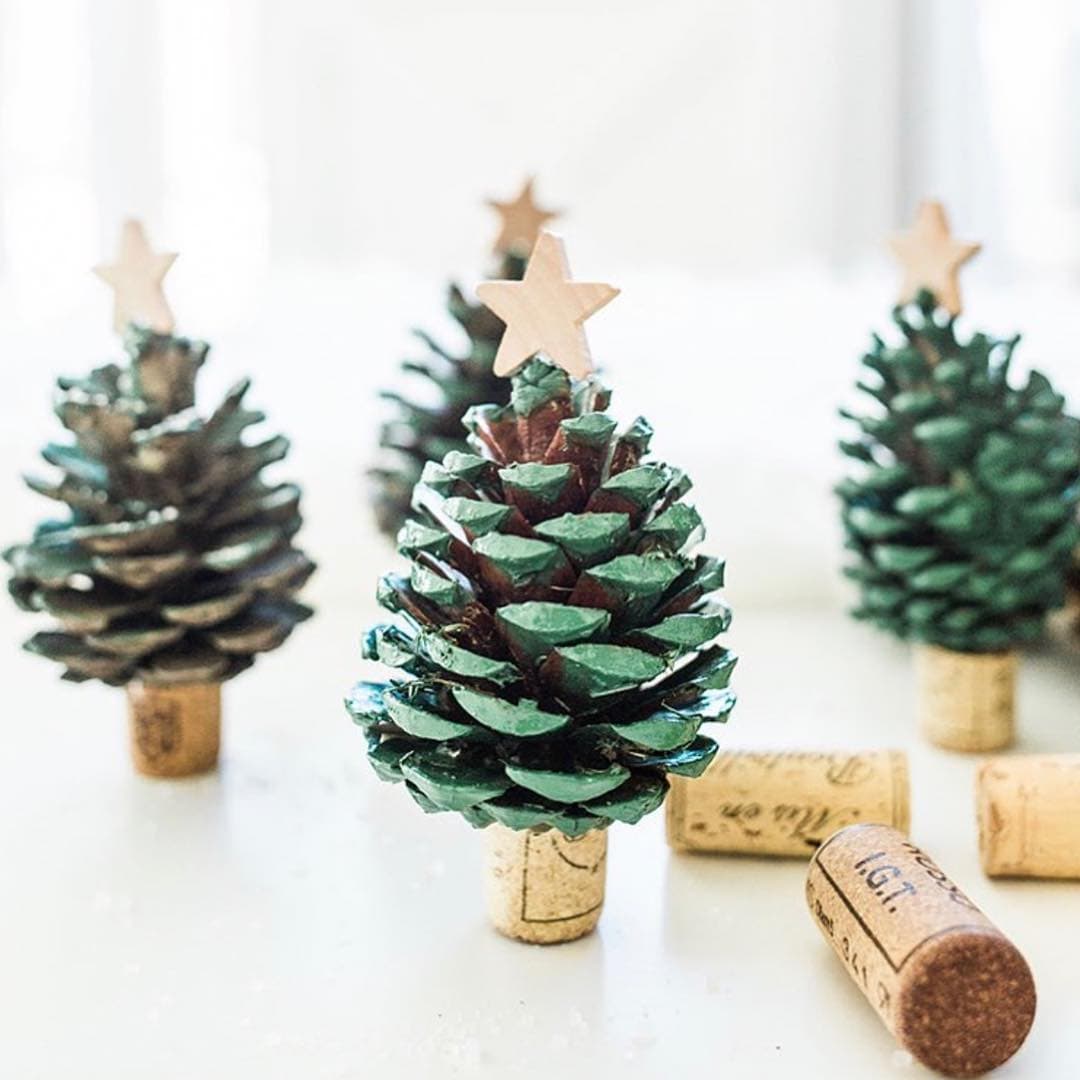
These tiny Christmas trees made out of pine cones and wine corks are the perfect holiday crafts to decorate your table. Bonus: These trees won’t shed needles all over the house!
Materials: Pine cones, spray paint, wine corks, scissors, hot glue gun and glue, any miniature decorations, like wooden stars, beads, spray glitter, etc.
Directions: Spray paint the outer edges of the pine cone and let the paint dry. Cut a wine cork in half and hot glue it to the bottom of the pine cone. Let the glue dry. Hot glue the star or any other decorations you like to the top. Allow the glue to dry.
4. Doily trees
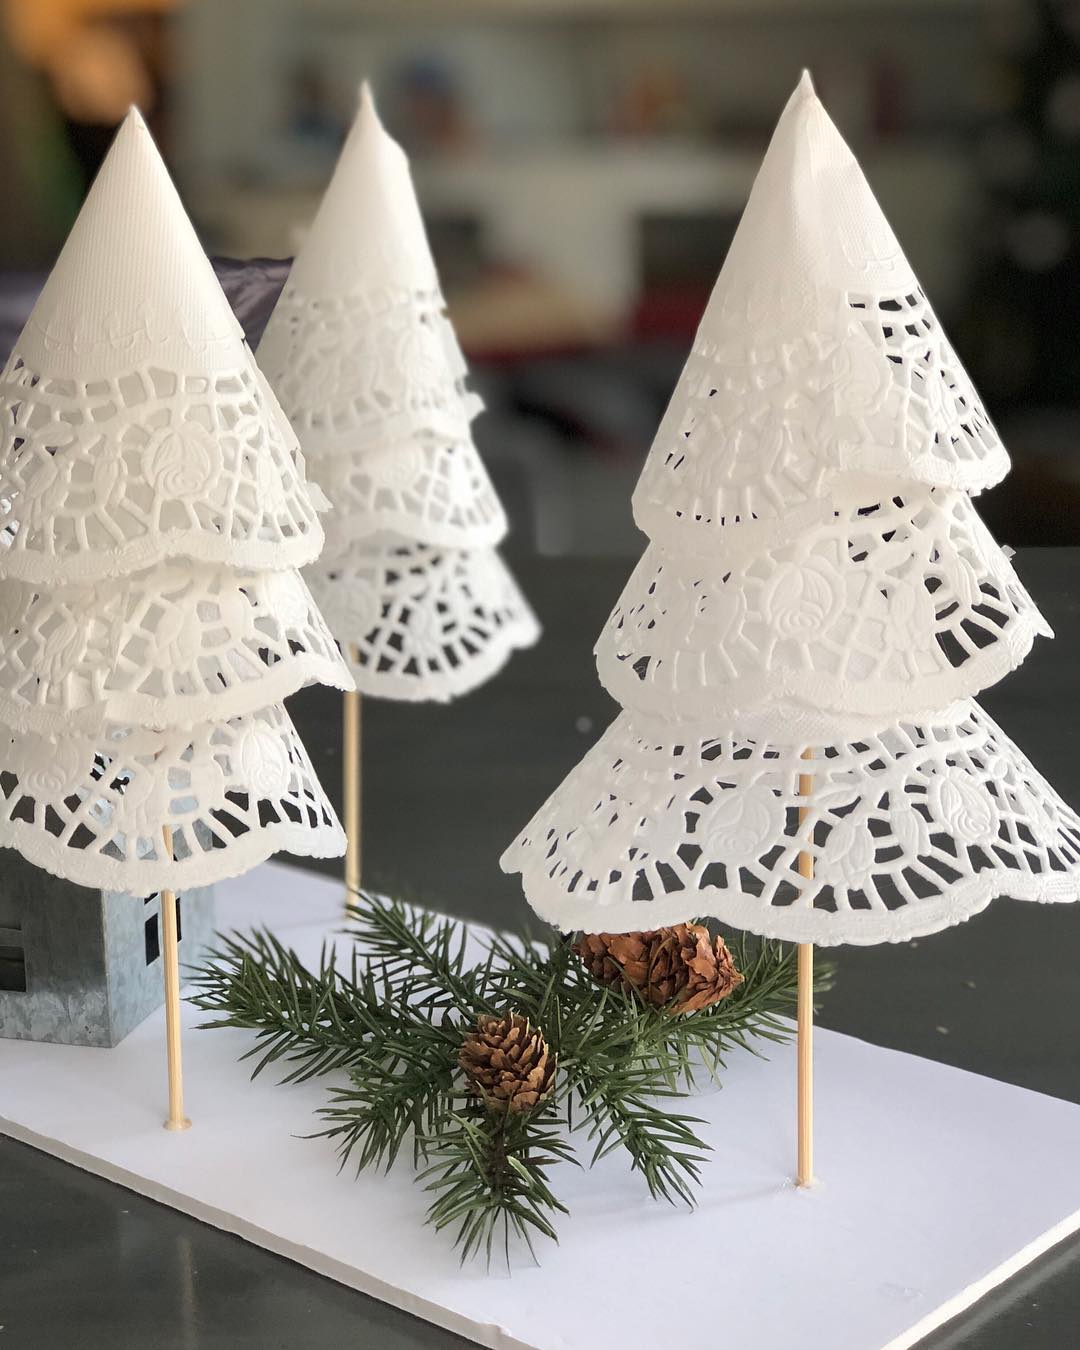
Looking for easy holiday crafts? These doily trees from @craftbash_unglued Instagram add a hint of winter wonderland to your home, whether there’s snow outside or not — and they can be made pretty quickly!
Materials: Small paper doilies, hot glue gun and glue, wooden skewers.
Directions: Cut two paper doilies in half and roll at least three of the halves into cone shapes, and secure the edges with glue. Thread the skewer through the tip of one doily cone until about two thirds of the skewer is visible above the tip of the cone. Glue the tip of the doily cone in place. Roll the glued section against the table to help the paper adhere. Allow the glue to dry. This example uses three half doilies, but add more for a fuller “tree.” Add the next few doily cones an inch or so above the first, and glue in place, again rolling the glued section and then allowing the glue to dry.
The trees can be added to your table centerpieces or propped up on a foam board. Just make sure the board is white to complete the snow effect!
5. Toilet paper roll snowmen
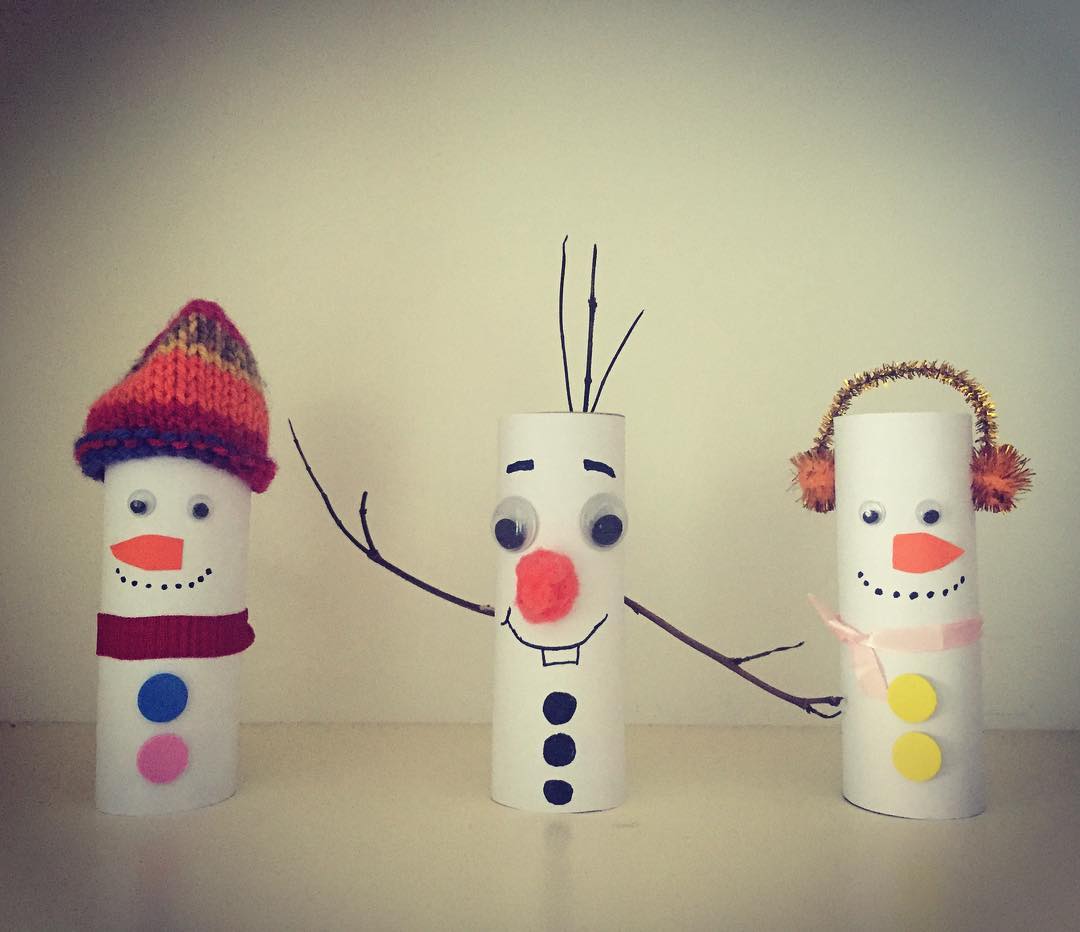
Making snowmen is a classic holiday craft activity. But when there’s no snow to be found, or it’s too cold outside to really enjoy bringing Frosty to life, these easy toilet paper roll snowmen from @curiousandgeeks on Instagram are the perfect alternative.
Materials: Toilet paper rolls or paper towel rolls cut in half, white paint, black paint or black permanent marker, paint brush, glue and any small decorations, such as googly eyes, foam stickers, ribbon, pipe cleaners, etc.
Directions: Paint the toilet paper rolls white, and allow to dry. Add faces with paint or marker. Now it’s time to really let your kids show off their imaginations: Let them create snowman “clothes” out of the other odds and ends from your craft box. Display!
6. Sparkly dreidels
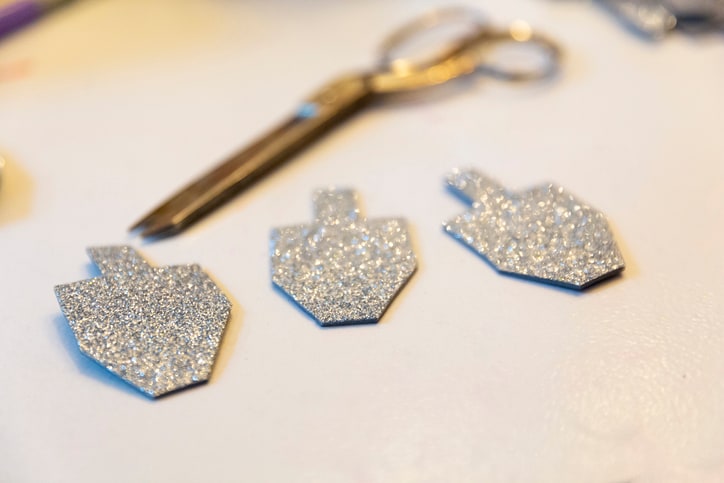
These easy-to-make sparkly dreidels can be used to decorate gifts, cards or walls. Kids who celebrate both Christmas and Hanukkah may even like making their holiday craft into ornaments for the tree.
Materials: Cardstock, spray adhesive, glitter. Optional: Hole punch and ribbon.
Directions: Cut out several dreidel shapes or trace them for kids who can use scissors (many older kids can probably do all these steps themselvesl!). Take the shapes outside where it’s ventilated, put down some newspaper or a dropcloth and add a light coat of spray adhesive to each dreidel. Kids can follow behind sprinkling glitter. Let dry and head inside to decorate! To turn them into ornaments, simply punch a hole at the top and tie a ribbon loop for hanging.
7. Rudolph ornaments
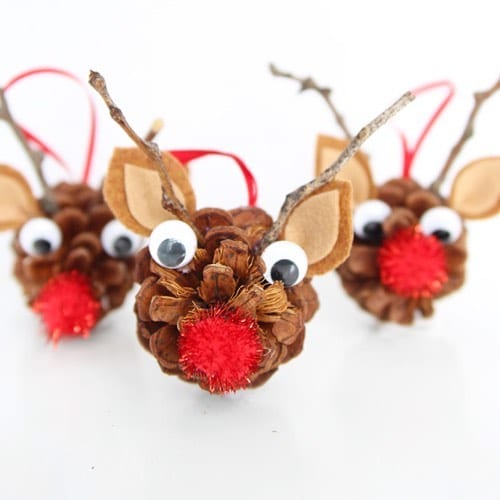
Kids will be excited to not only make these happy-making reindeer ornaments (via @littlefishkopp on IG) but also to hang them on their Christmas tree. These easy holiday crafts for kids make sweet little gifts for grandparents or teachers and can even be used as decorative additions on a gifted cookie platter.
Materials: Pine cones, googly eyes, pom poms, felt, twigs, ribbon.
Directions: Cut a pair of reindeer ears out of felt and then glue them, along with the reindeer’s googly eyes, pom-pom nose and twig antlers in place. The last step is gluing a ribbon loop at the back for easy hanging.
8. Popsicle stick snowflakes
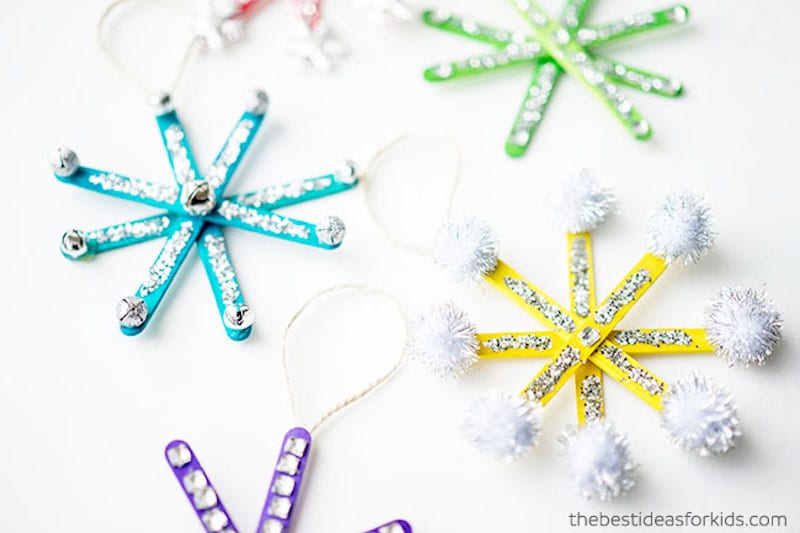
Sure, Popsicle stick crafts have been around for a long time, but you’d be hard-pressed to find ones prettier than the Popsicle stick snowflake ornaments from The Best Ideas for Kids. These beauties would look great on a tree or hanging anywhere around the house.
Materials: Popsicle sticks (color or plain), tacky glue, hot glue gun, jingle bells, glitter, glittery stickers, rhinestones and pom poms and twine.
Directions: Get the tutorial for how to make these Popsicle stick snowflake ornaments over on The Best Ideas for Kids.
9. Clothespin reindeer ornaments
Need a gift topper that really makes that present stand out? How about a pretty clip to hold all of your kiddo’s school paperwork together? These clothespin reindeer ornaments from the folks at One Little Project are one of the simplest holiday crafts, and they’re useful to boot!
Materials: Clothespins, hot glue gun and glue, pipe cleaners, ribbon, mini pom poms, googly eyes, marker, string.
Directions: First, draw the reindeer’s legs and hooves with marker. After that, create antlers with a brown pipe cleaner and hot glue it, along with a looped piece of string, to one side of the top of the clothespin. Next, stick on the googly eyes, hot glue the pom pom nose and wrap a piece of ribbon around the neck area as a scarf (securing in place with hot glue). Allow to dry. Use on gifts, cards, the tree or anywhere things need to be clipped together!
10. Craft paper pockets
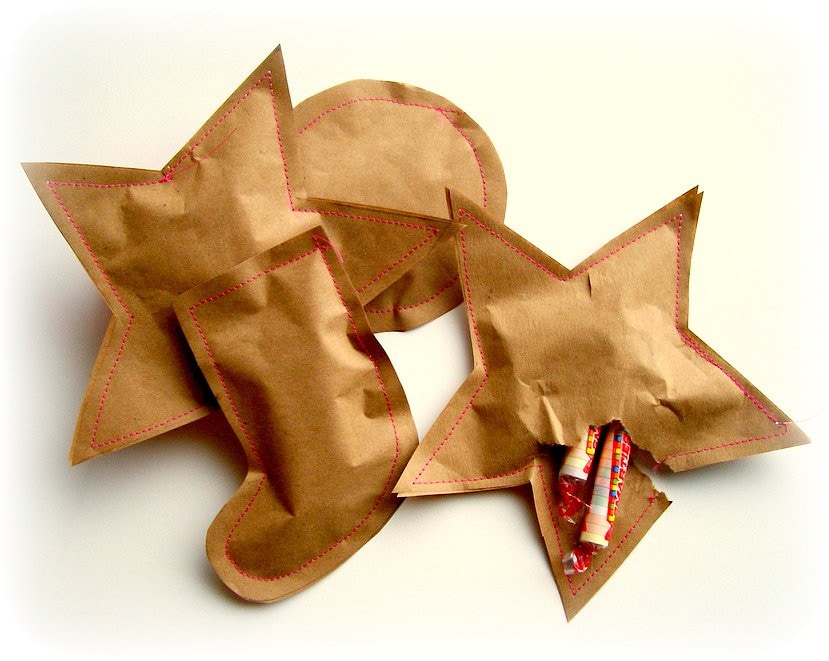
These craft paper pockets from Peppermint Plum can be stuffed with small surprises, making them a fun option for the eight nights of Hanukkah, an alternative to the standard stocking or fun favors you send home with guests after a holiday meal. The pouches can be torn open like typical presents.
Materials: Craft paper or brown paper bags, needle, thread, scissors, pencil, tissue paper (optional).
Directions: Line two pieces of brown paper back to back. Cut the two pieces into shapes — you may want to draw the shapes on first, so you have a guideline to follow with the scissors. Grab a pencil, and draw a dotted line around the outer edge of one piece of your paper, leaving at least a quarter of an inch between your line and the paper’s end. Place your surprises in between the two sheets of paper (wrap them in tissue paper if they have sharp edges). Grab a needle and thread, and begin sewing up the pouch, following the dotted line. If you have a sewing machine, you can make even faster work of this!
11. Vintage button gift tags
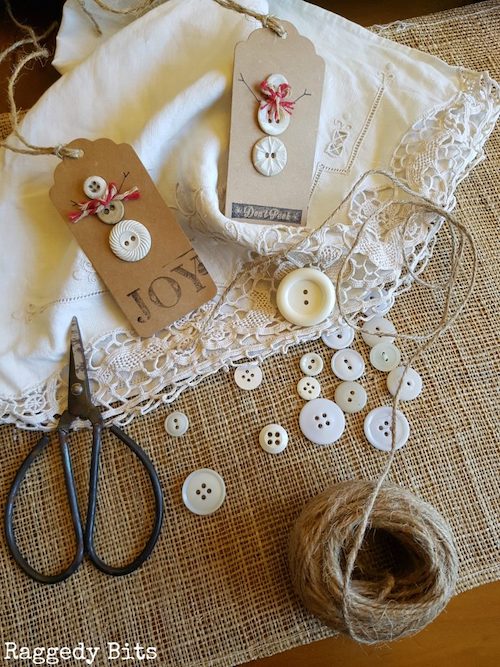
Who needs to buy expensive gift tags when your kids can make these adorable vintage button snowman gift tags from Raggedy Bits. So cute!
Materials: Kraft tags, white buttons, fine Sharpie, hot glue gun, stamps, jute red butchers twine, scissors, black stamp pad.
Directions: Find step-by-step directions for this project on Raggedy Bits.
12. Reindeer hot cocoa cones
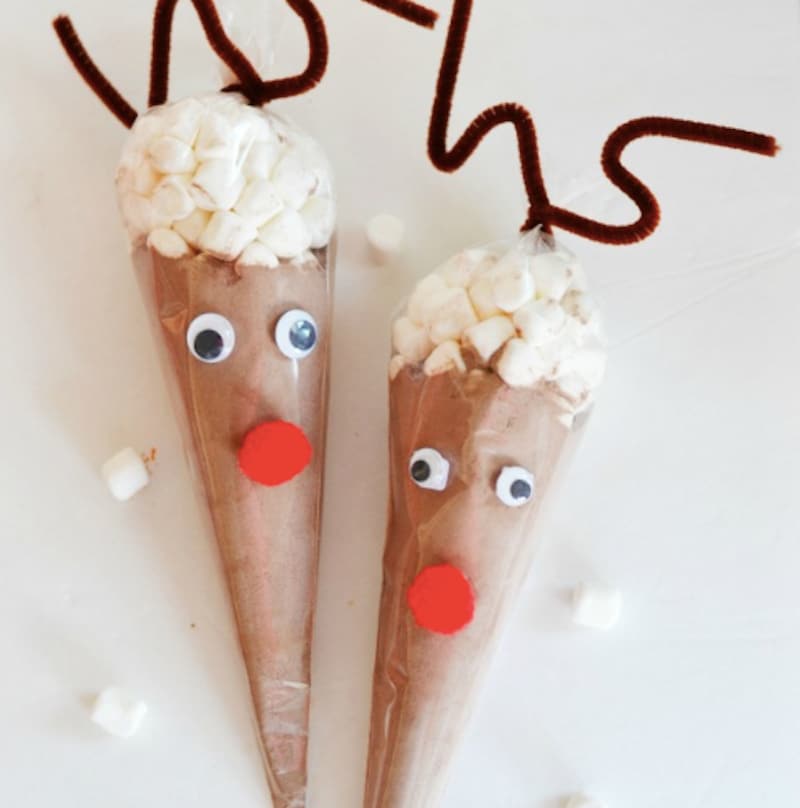
What’s better than hot cocoa on a cold winter day? The adorable, easy-to-make reindeer hot cocoa cones from Savvy Saving Couple. A great holiday gift for babysitters or even teachers and coaches.
Materials: Powdered hot cocoa, mini marshmallows, large piping bags, red pom poms, brown pipe cleaners, googly eyes and circle sticky tabs.
Directions: Get step-by-step directions for making these reindeer hot cocoa cones over on Savvy Saving Couple.
13. Fingerprint holiday light frame
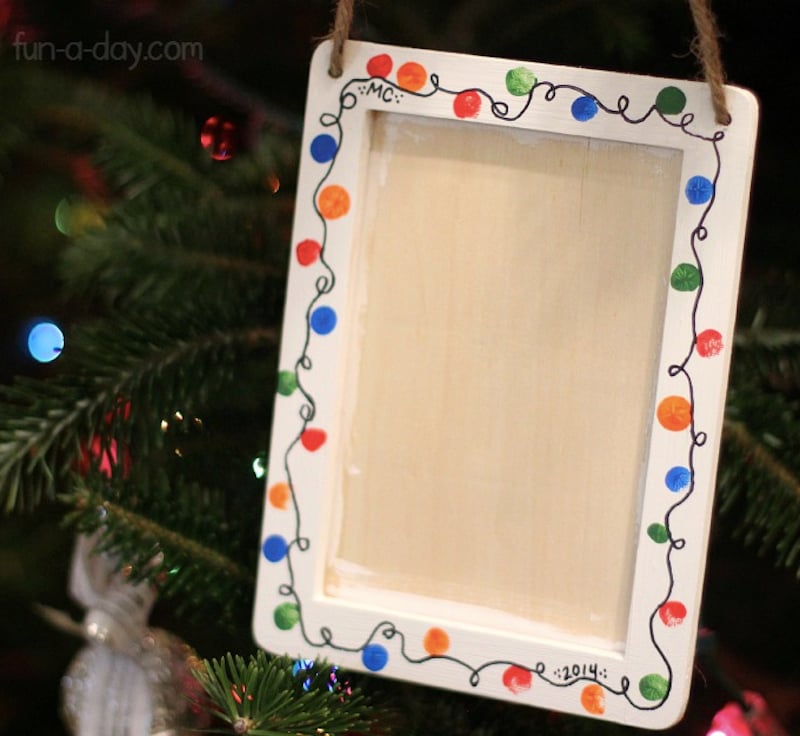
Want to give your child’s nanny a holiday keepsake they’ll cherish forever? Make them this sweet fingerprint holiday light frame from Fun-A-Day. And of course, don’t forget to include a memorable photo.
Materials: Wooden craft frame, black permanent marker, acrylic paint in 4-5 colors and a favorite photo.
Directions: Check out the how-to for making this fingerprint holiday light photo frame on Fun-A-Day.
14. Beaded snowflake ornaments
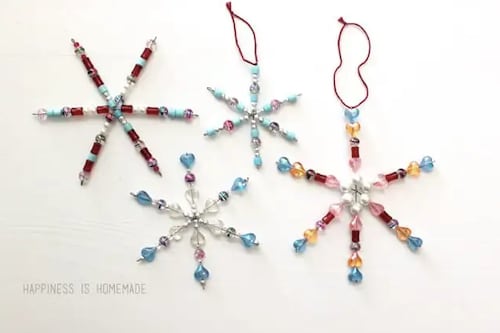
Not only are these beaded snowflake ornaments from Happiness is Homemade one of the prettiest holiday crafts out there, they’re also a great opportunity for kids to work on their fine motor skills. (Note: If doing with little kids, make sure an adult cuts the wire for the snowflakes; leave the beading to the kids!)
Materials: Wire snowflake forms, assorted beads, needle nose pliers, string or ribbon for hanging.
Directions: Find step-by-step instructions for this project on Happiness is Homemade.
15. Cookie cutter ornaments
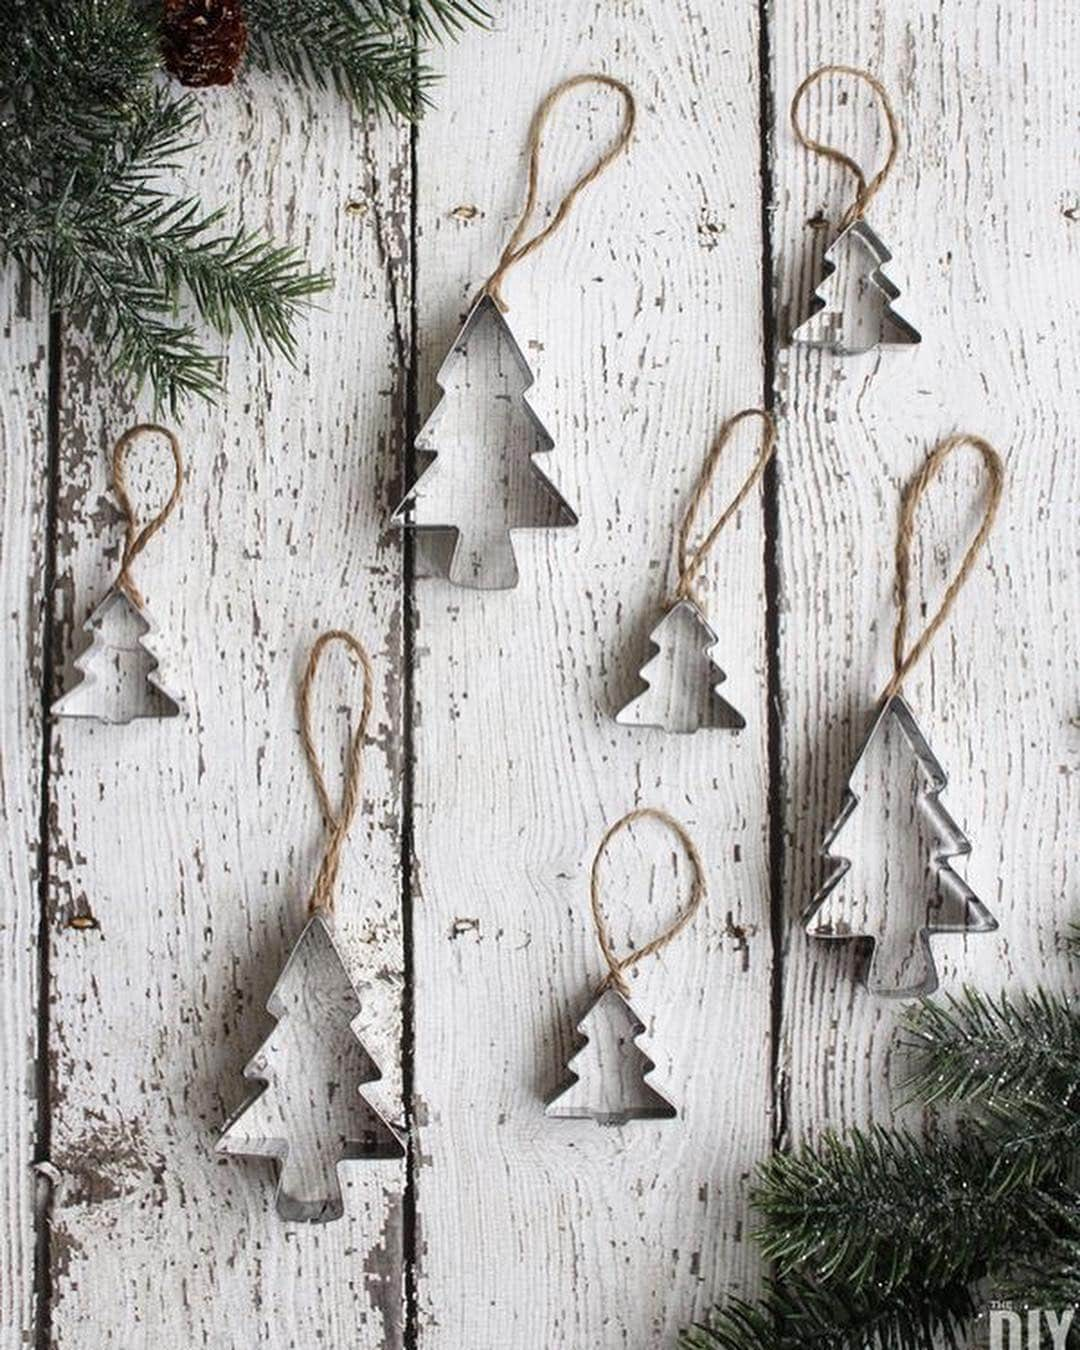
Homemade gifts are always a hit with grandparents, teachers, and of course your nanny. These cookie cutter ornaments from Jill Morgan are truly one of the easiest holiday crafts out there, and they’ll be used again and again.
Materials: Silver metal cookie cutters in holiday shapes, ornament string or twine.
Directions: Cut a 6-inch piece of ornament string. Thread through the cookie cutter, and tie in a tight knot. Ask your child to choose who gets each ornament, or let them hang them on your own tree.
16. Sled ornaments
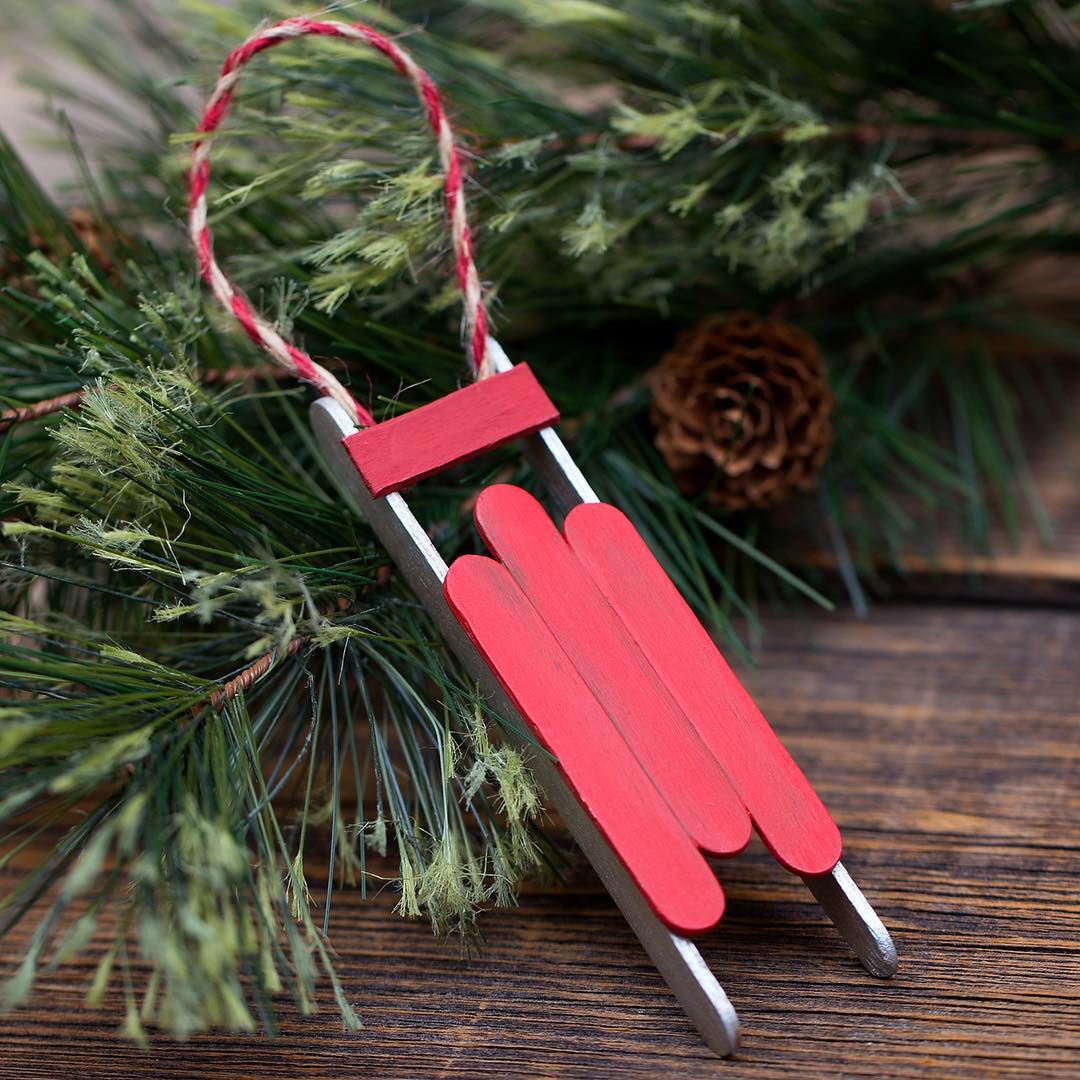
Santa’s headed to town soon, but he’s going to need his sled. Thank goodness you’ve got some Popsicle sticks lying around, right? Time to make some of these sled ornaments from @firefliesandmudpies on IG.
Materials: Popsicle sticks or craft sticks, scissors, hot glue gun and glue, paint, paint brush, baker’s twine or other thread.
Directions: Cut three popsicle sticks in half, or use three mini craft sticks. Line them up, side by side, and shift the middle stick slightly up, so it the sticks are staggered. Glue the sides of the sticks together to form the seat of the sled. Allow glue to dry. Cut another stick down to the width of the seat. Both rounded ends should be removed. Paint this stick and the seat. Allow to dry. Glue one full-sized stick, propped on its sized, on the bottom edge of the seat. Repeat on the other side. Allow to dry. Add a loop of baker’s twine or similar thread to the top, gluing in place. Hang on the tree!
17. Thumbprint reindeer ornaments
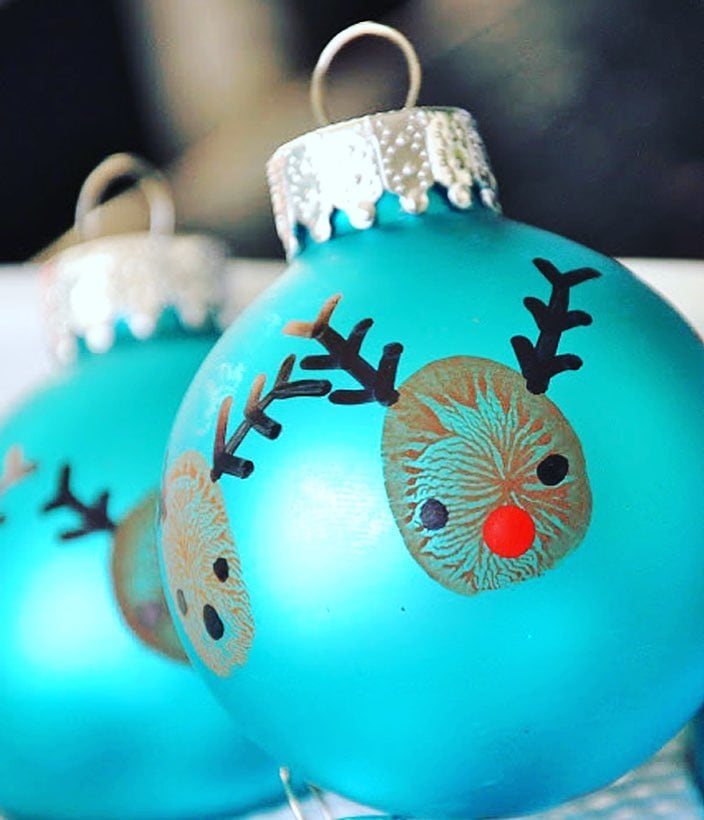
Bring Rudolph to life with the help of a little paint and little thumbprints. These reindeer ornaments (thank you, @christmas_bliss) double as decor and a yearly reminder of how much they’ve grown.
Materials: Solid colored ornaments, brown and red paint, black paint or a black permanent marker, paint brush, paper plate.
Directions: Pour a dollop of brown paint on paper plate. Allow your child to dip the pad of their thumb in the paint (smaller kids may need a little help with this). Place paint-covered finger against ornament and hold for two seconds to allow paint to adhere. Repeat to create additional reindeer faces around the surface of the ornament. Allow paint to dry. Add antlers and eyes with black paint or permanent black marker. Allow to dry. Add a dot of red paint to the center of each face for a bright Rudolph nose.
18. Snowman treat box
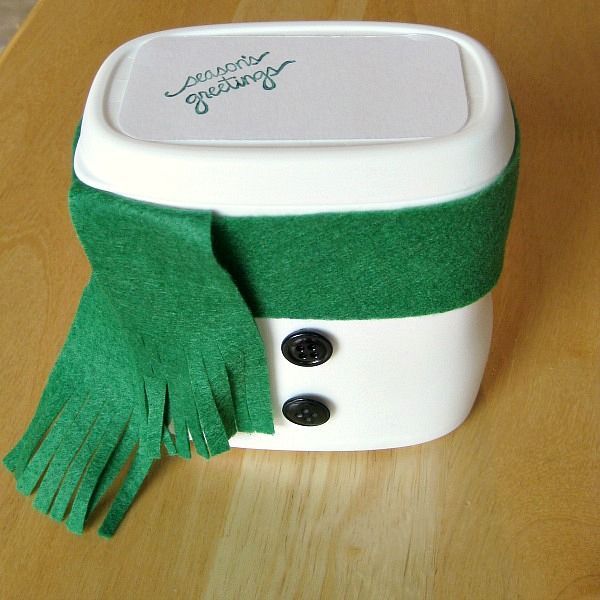
Don’t throw out that old container! Re-use it to hold holiday treats and make a snowman canister idea from Susan @organized31 that won’t melt away when the holidays are over.
Materials: Empty white plastic container (diaper wipes containers are perfect), black buttons, hot glue gun and glue, scissors, green fabric or felt, thick white paper, permanent marker
Directions: Thoroughly wash the insides of the container (especially if this will hold any sort of food). Wrap green fabric around the container, just below the lip of the lid. Where the two ends of the fabric meet, lay one over the other, allowing a few inches to hang off on each side. Use scissors to cut small slits in the ends to create “fringe” for the snowman’s scarf. Glue scarf in place and allow to dry. Glue black buttons along the front of the container. Cut white paper to fit the lid. Write a holiday message with permanent marker. Glue paper on top. Fill with treats!
19. Washcloth reindeer
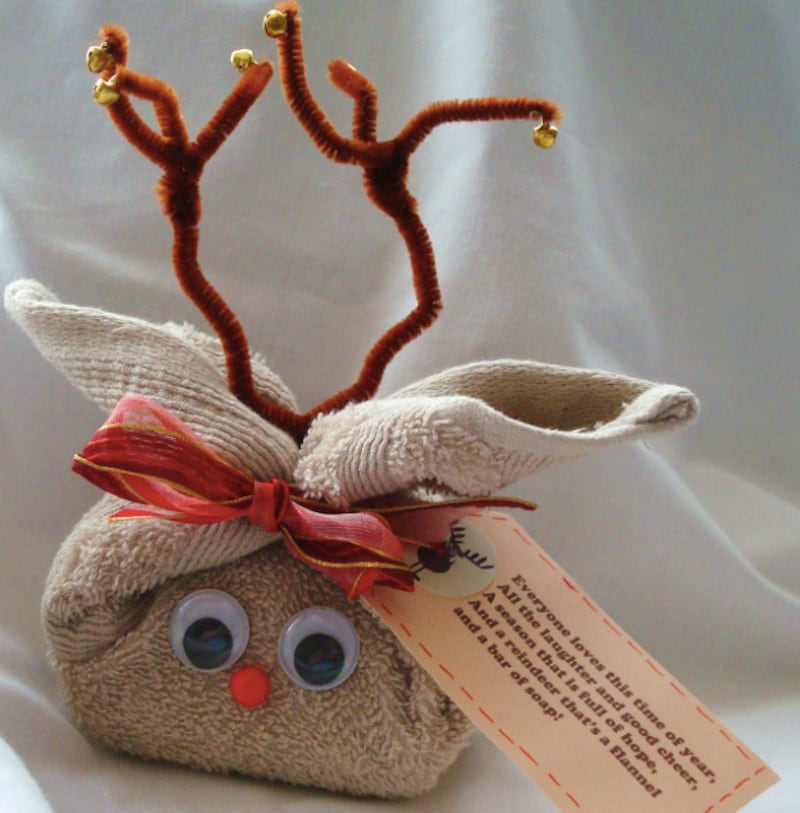
Want to see something super cute? Check out this adorable — majorly affordable — washcloth reindeer from Bumble Bee’s Craft Den. Don’t forget to have your child add a special poem or note!
Materials: Tan washcloth, bar of soap, googly eyes, brown pipe cleaners, tiny bells, red pom pom (for nose) and ribbon.
Directions: Follow the tutorial for how to make these washcloth reindeers from Bumble Bee’s Craft Den.
20. Snowman ornament
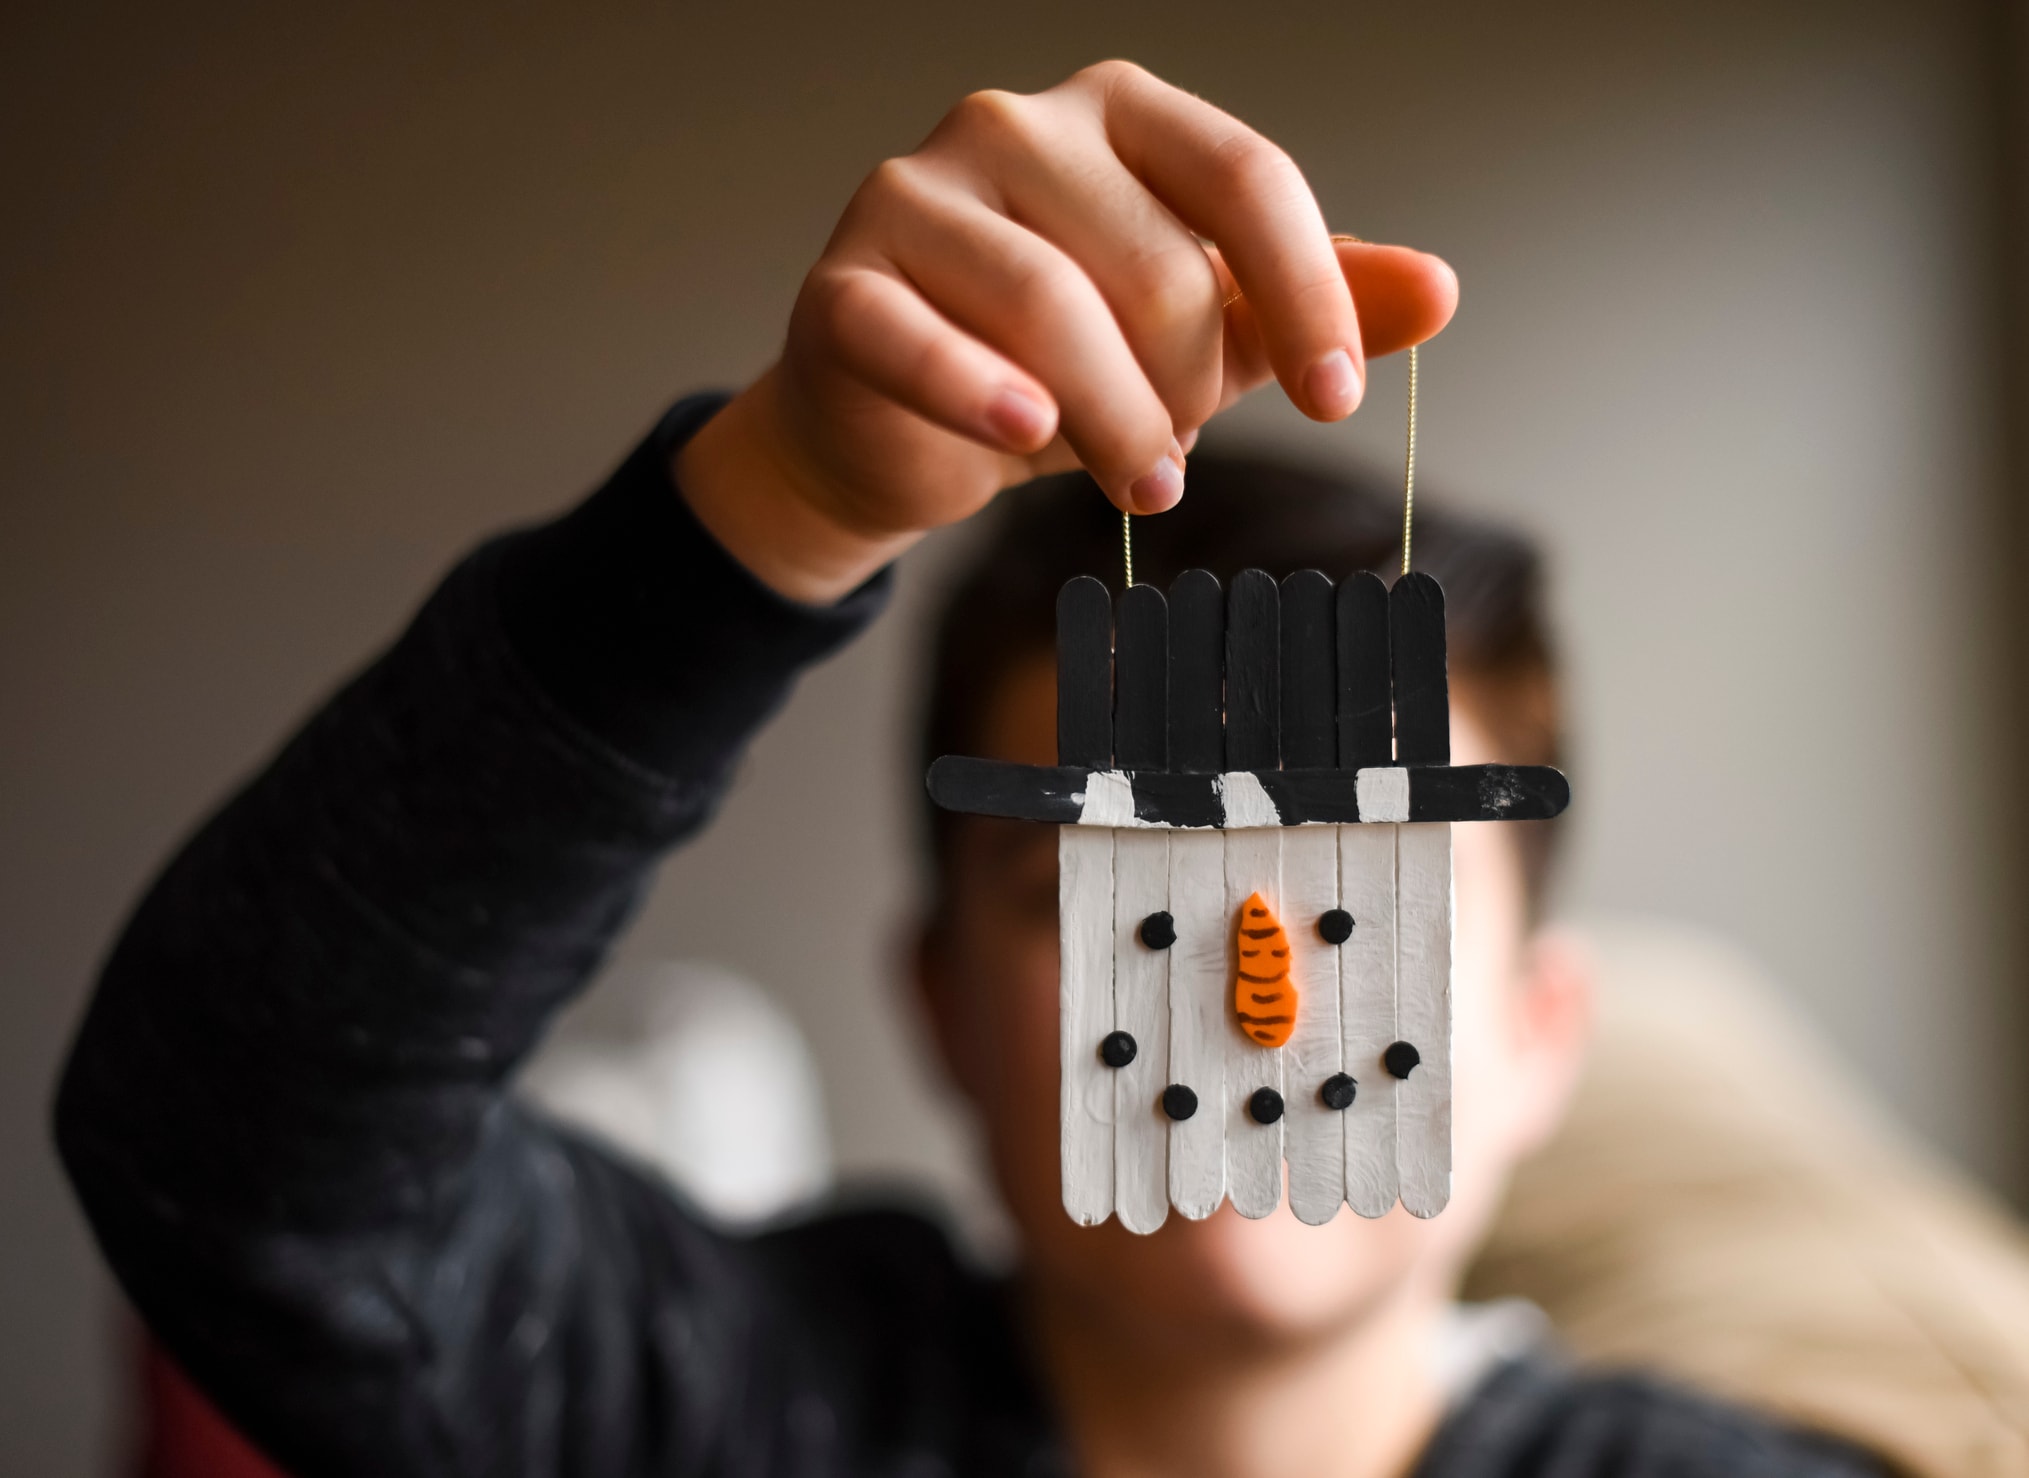
Still feel creative and have lots of leftover Popsicle sticks? Then let the kids whip up some of these happy-faced snowman ornaments. They’re easy and cute.
Materials: Popsicle sticks or craft sticks, hot glue gun and glue, paint, paint brush, foam stickers, baker’s twine or other thread.
Directions: Line up seven (or so) sticks, side by side, and then glue an additional stick vertically across them, about 1/3 the way down. Allow glue to dry. Paint the snowman’s face and his top hat and allow to dry. Then use stickers, markers or more paint to make a snowman’s eyes, nose and mouth. Add a loop of baker’s twine or similar thread to the back and glue in place. A perfect package topper, which can be then be used as an ornament.
